준비사항
- WiFi 로그인 정보 (ID, Password)
- Screen Lock Password
- App Login Info (User name and Password)
Requirements
-
WiFi login information (ID and password)
-
Screen lock password
-
App login credentials (username and password)
안드로이드 패드 전원 켜고 끄기 Turning the Android tablet on and off
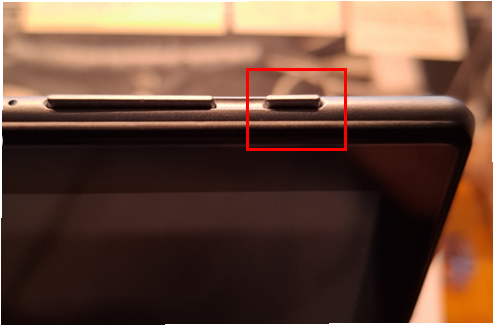
- 패드 상단의 오른쪽 버튼을 클릭하여 켭니다.
- 업무 마감후 퇴근시에는 이 버튼을 다시 눌러 전원을 꺼줍니다.
- 가능하면 전원을 항시 충전 상태로 유지 하는것이 좋습니다.
- Press the button on the top right of the tablet to turn it on.
- At the end of the day, press the same button again to turn it off.
- If possible, keep the tablet plugged in and charging at all times.
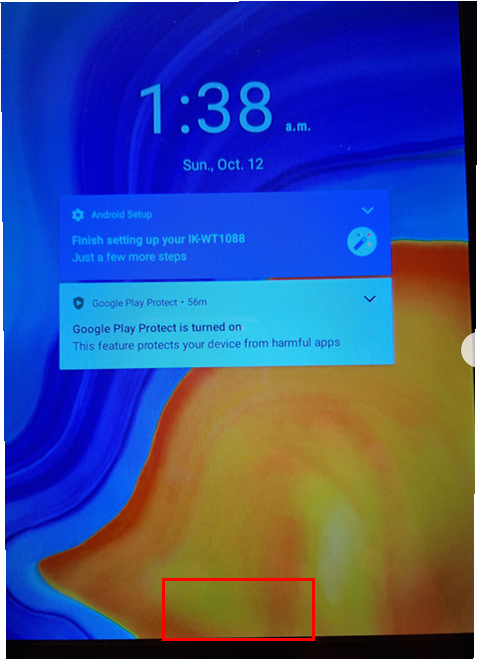
화면의 아랫부분을 손가락으로 누른채 위로 쓸어 올립니다.
Swipe up from the bottom of the screen while holding your finger on it.
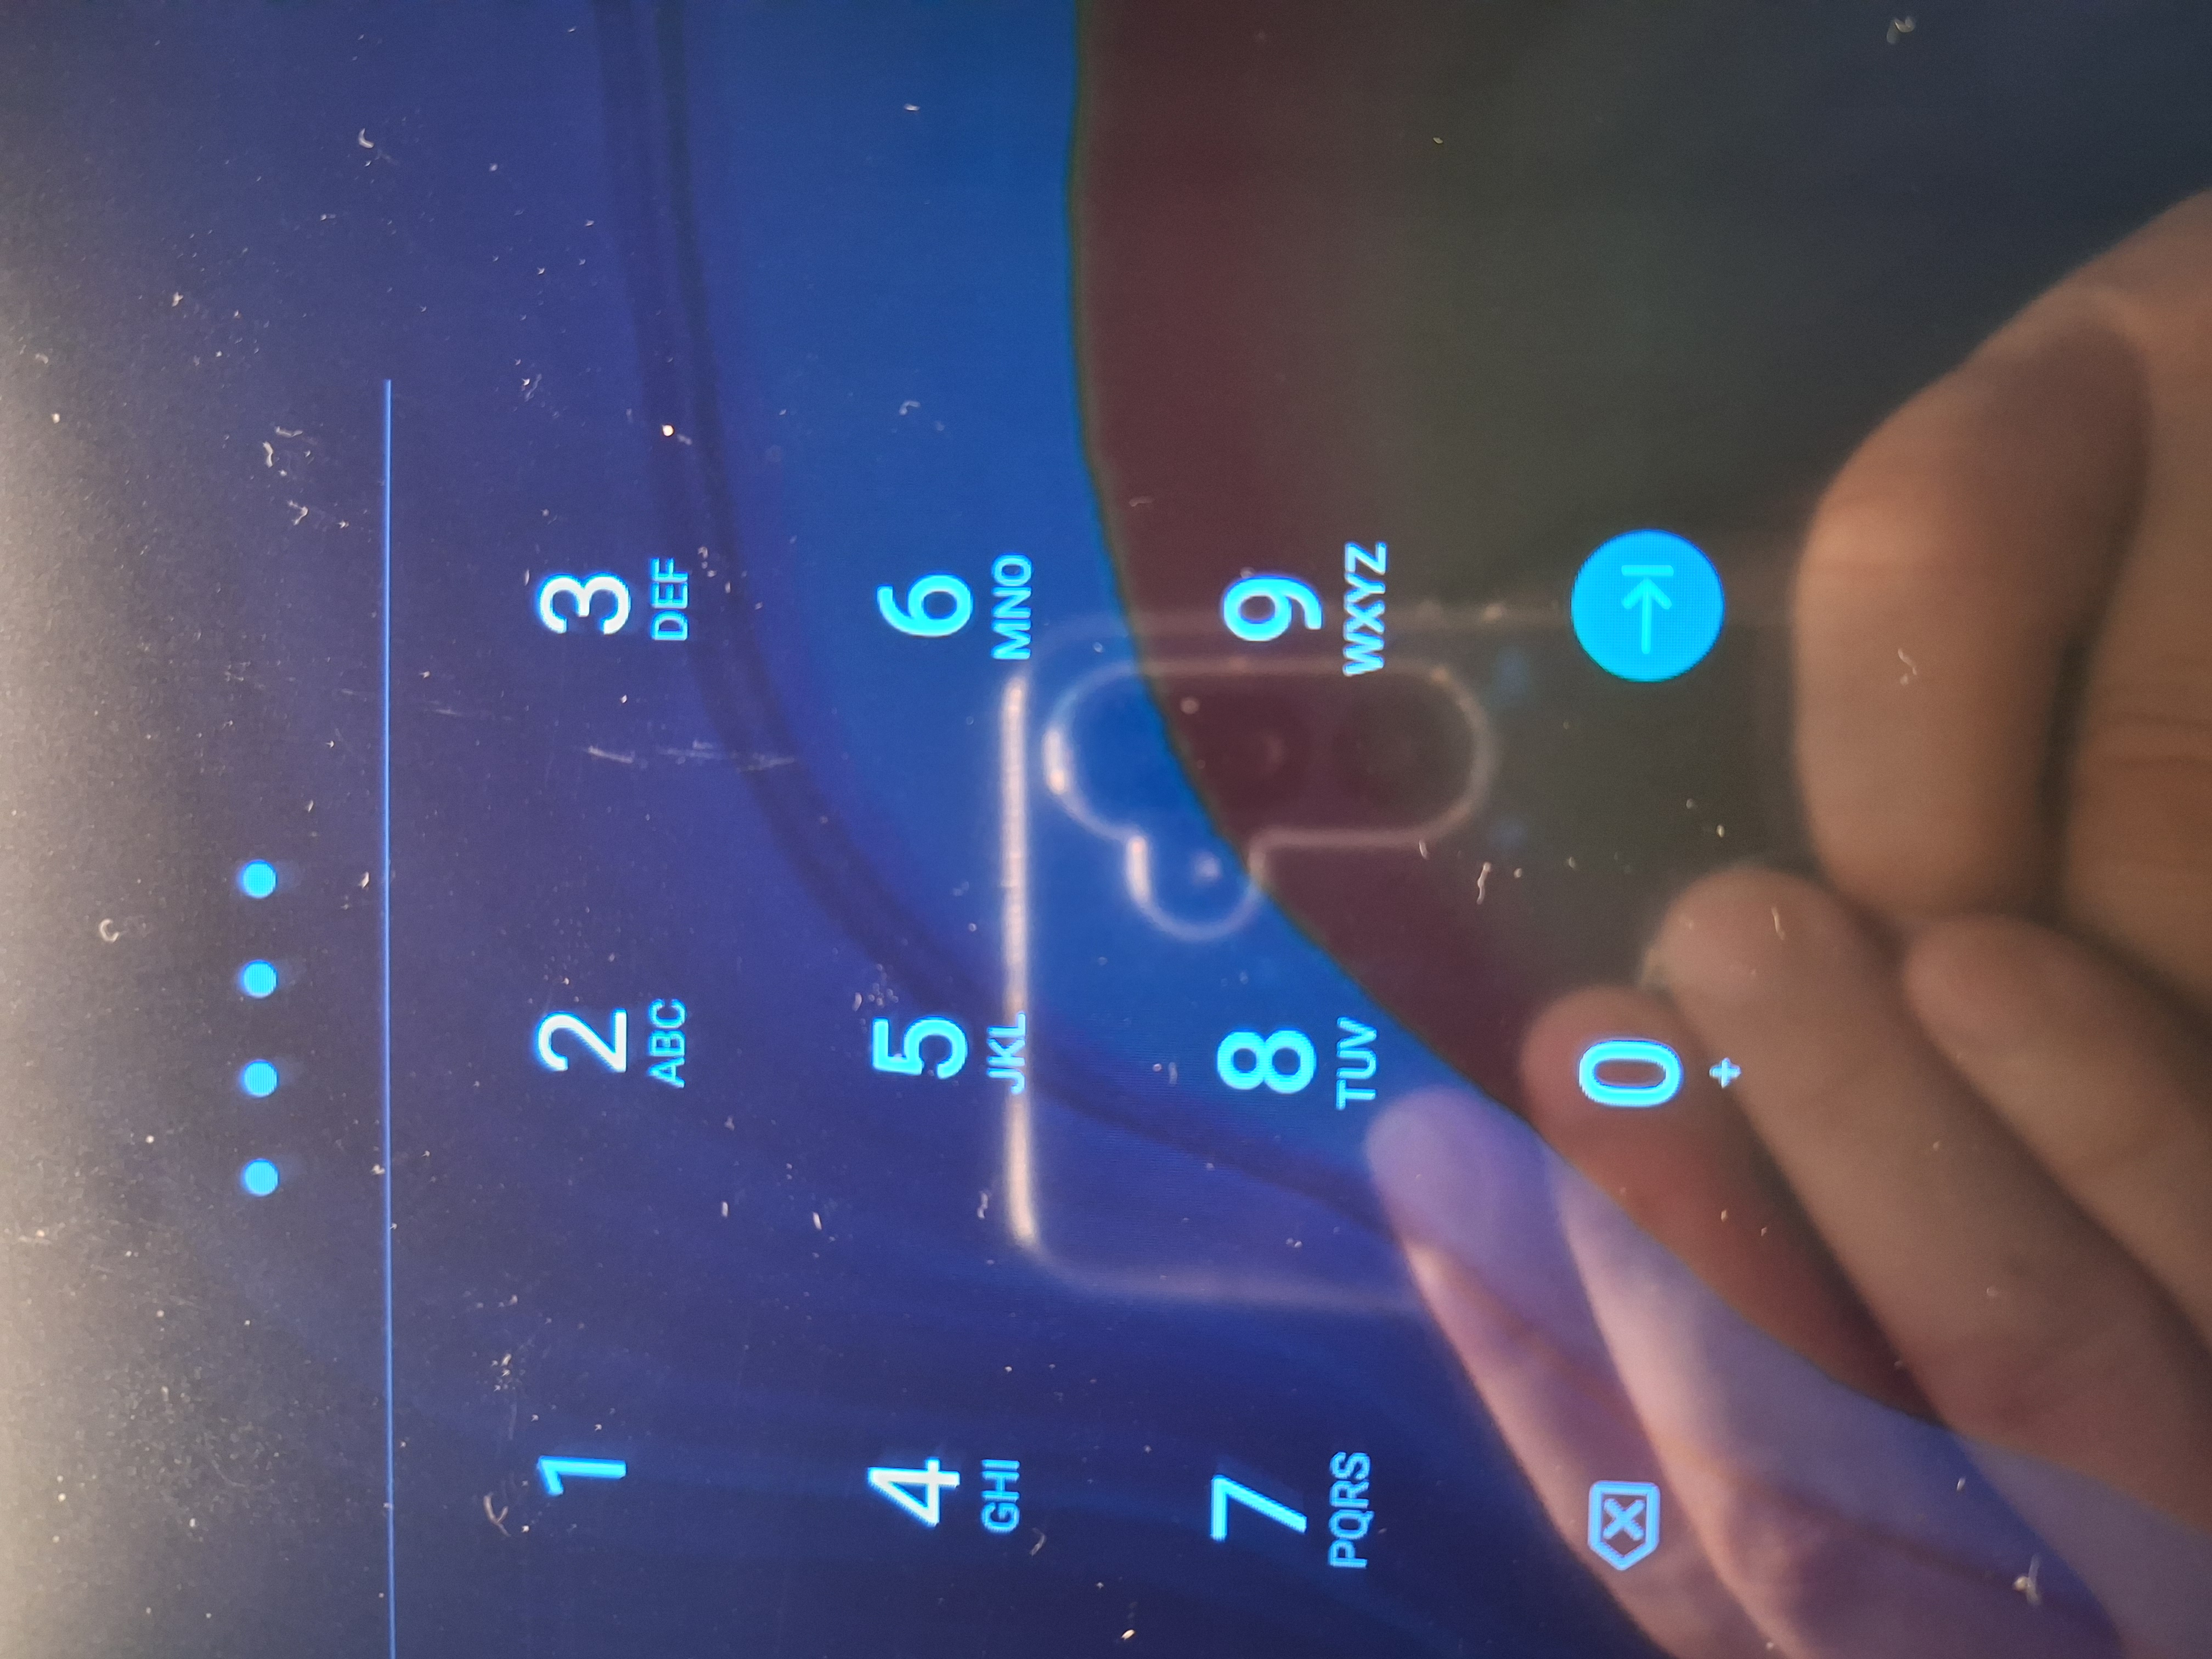
Screen Lock Password 4자리를 입력 합니다.
Input for the screen lock password for four four-digit.
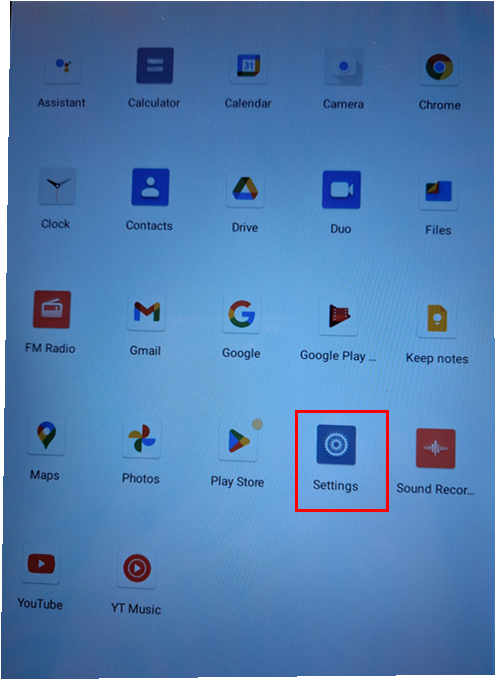
Settings 버튼 찾기 Find Settings button
이곳에서 화면 아래을 터치한 상태에서 위로 쓸어 올리시면 다음 화면이 나옵니다.
이것은 Settings 버튼을 찾기 위해서 입니다.
From here, swipe up from the bottom of the screen while holding your finger down to open the next screen.
This step is to help you find the Settings button.
Settings 를 클릭 합니다.
Settings 에서 와이파이 연결 및 화면 꺼짐 방지를 설정 할 수 있습니다.
Tap Settings.
In Settings, you can connect to Wi-Fi and adjust the screen timeout settings to prevent the display from turning off.
Android pad WiFi 연결하기
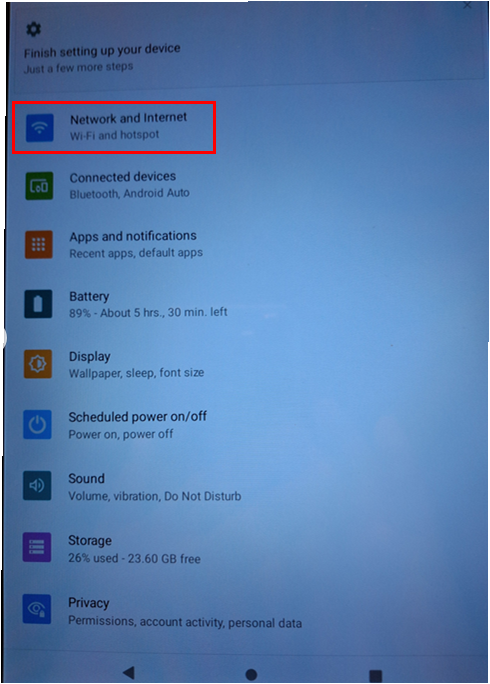
Network and Internet 버튼을 클릭하여 WiFi 를 연결 합니다.
Click the Network & Internet button to connect to Wi-Fi.
Android Pad 전원이 항상 켜 있게 하기-Android New Version
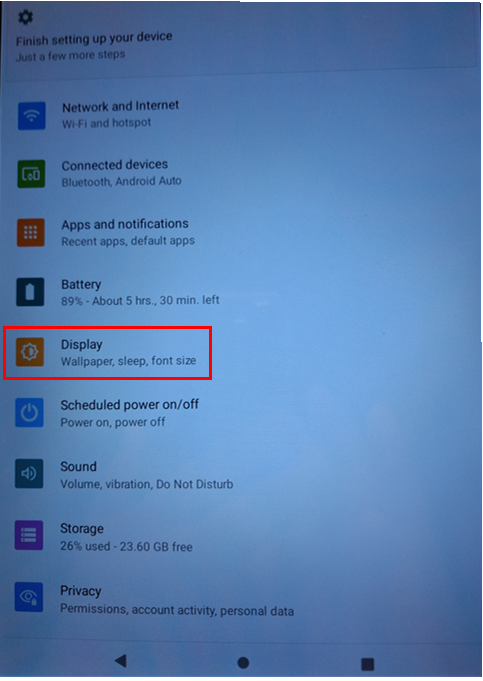
Display 를 클릭 합니다.
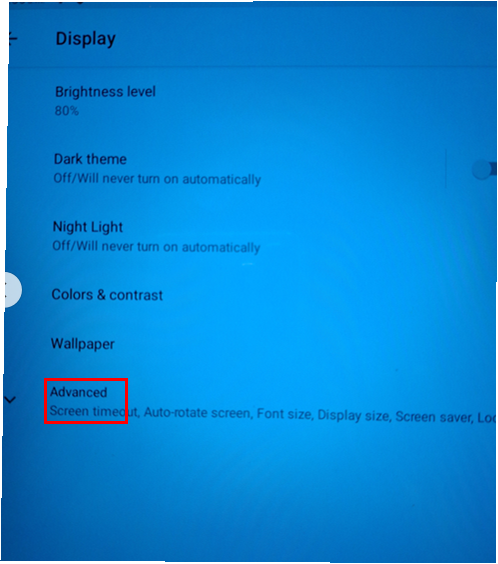
Advanced 를 클릭 합니다.
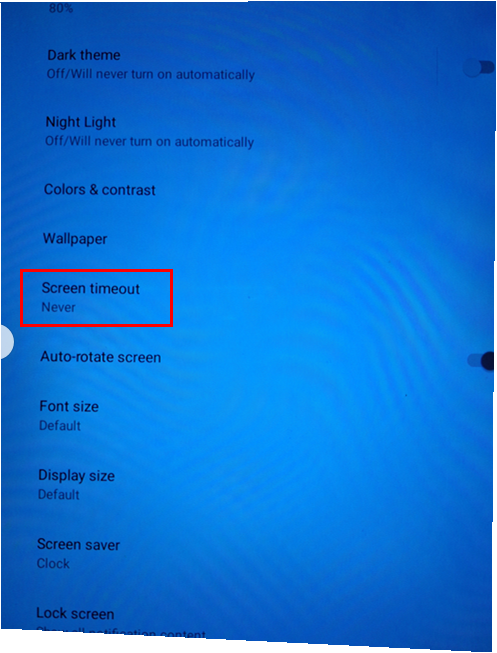
Screen timeout 에 Never 라고 표시 되어야 합니다. 만약 아니라면 클릭하여 Never 를 선택 바랍니다. 그래야 테블릿이 꺼지지 않습니다.
Android Pad 전원이 항상 켜 있게 하기-Android Old Version
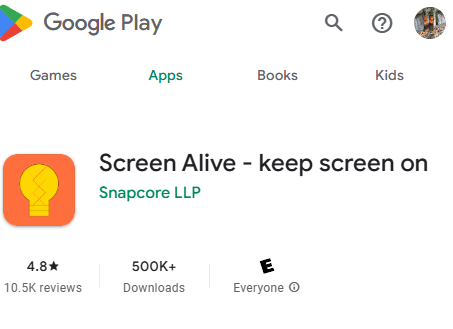
안드로리드 old version 은 "Never" 가 없는 경우가 있습니다.
그럴 경우에는 아래의 입을 설치 바랍니다.
패드에서 App Store 를 오픈 합니다.
검색에서 "Screen Alive - keep screen on" 을 검색하여 설치 합니다.
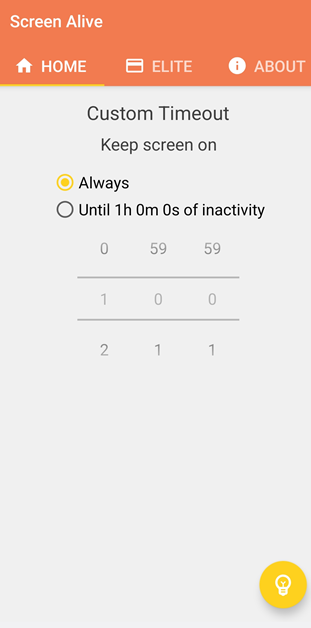
오른쪽 하단의 전등빛 로고를 클릭하여 Always 를 클릭 하시면 전원이 꺼지지 않습니다.
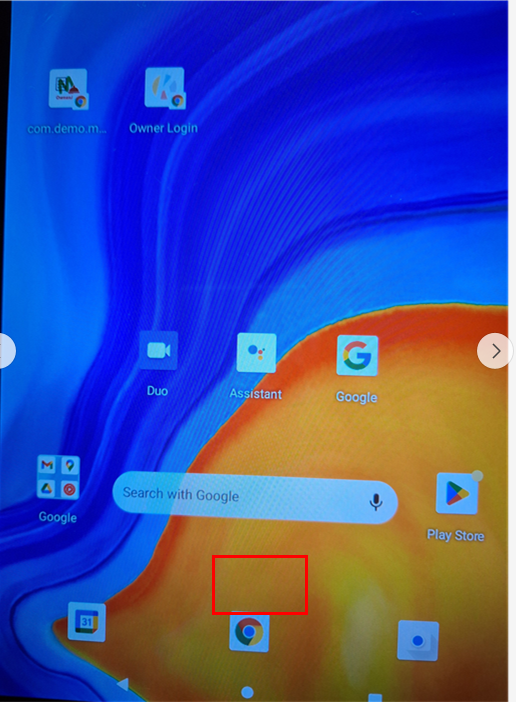
Android 홈 화면으로 가기
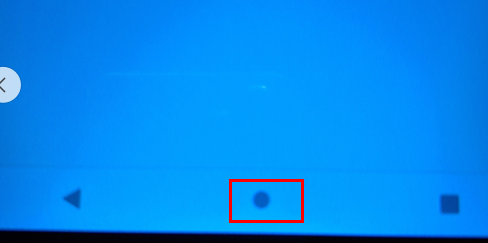
테블릭 화면 아래의 동그라미를 클릭하여 홈 화면으로 갑니다.
MenuOneCa.com 의 Merchant App 로그인 하기
아래의 QR Code 를 안드로이드 패드나 스마트폰에서 스캔 합니다.

위 QR code 를 스켄하면 아래와 같은 화면이 나옵니다.
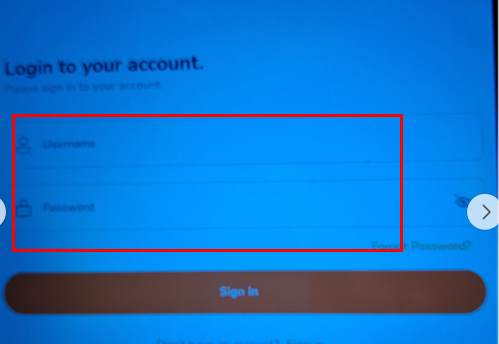
이미 알려드린 Username, Password 를 이용하여 로그인 합니다.
로그인 하면 아래와 같은 화면이 나옵니다.
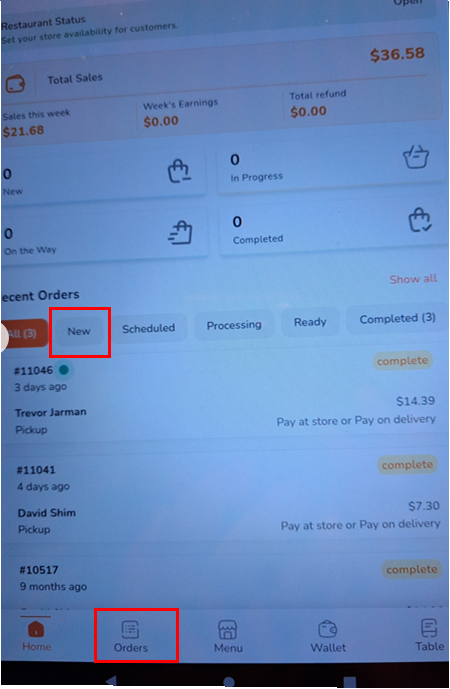
언제나 New 버튼을 클릭한 상태로 있어야 새로운 주문을 볼 수 있습니다.
All: 모든 주문을 볼 수 있습니다.
New: 새로운 주문을 볼 수 있습니다.
Scheduled: 오늘 이후의 주문 입니다. 그리니까 내일날짜 주문부터 나타 납니다.
Processing: 주문온것을 Accept 하면 해당 주문은 Processing 에 나타나고, 음식 준비중임을 고객에게 푸시 알림으로 보냅니다.
Ready: Processing 에 주문중 완료가 된것을 Ready 버튼을 누르면 이곳에 표시 됩니다.
Completed: 이것은 Ready 에 있는 음식중 완료된것을 고객이 찿아간 후 표시 됩니다.
참고사항
참고 1: 화면 아래에 있는 Wallet, Table 은 요청하신 레스토랑만 이용할수 있습니다.
참고 2: 스마트폰에서 로그인하면 고객에게 필요시 전화 하기도 좋습니다.
 02-Android Pad or Phone 에 모바일 앱 아이콘 만들기


